 |
The Back 9
|
Go back to
|
||||
 |
||||||
| Back | 10 | 11 | 12 | 13 | 14 | 15 | 16 | 17 | 18 | In |
| Par | 5 | 3 | 4 | 4 | 5 | 4 | 3 | 3 | 4 | 35 |
| Blue | 573 | 142 | 351 | 280 | 495 | 281 | 189 | 115 | 356 | 2782 |
| White | 567 | 139 | 342 | 272 | 471 | 276 | 161 | 107 | 348 | 2683 |
| Red | 517 | 135 | 333 | 255 | 445 | 271 | 144 | 92 | 340 | 2532 |
Welcome back for more hole-by-hole tips that can help to make your round a great one. Holes 10 through 18 are every bit as fun and dramatic as 1 through 9, so buckle up your seat belts and let's begin!
| 10 | Your first shot on hole 10 is from an elevated tee box near our Gazebo. You have to carry over the pond below, then up the hill on the other side. Playing to about 570 yards, even long hitters probably won't reach this green in two. Follow your drive with a fairway wood or long iron down this wide open fairway. This will leave you with a short to mid-iron approach shot into a green guarded by a sand bunker on the left and trees behind.
|
| 11 | Consider the 11th hole a reprieve at this point, as it will be one of the few chances for an "easy" par. "Easy" is, of course, a relative term in golf. This par 3 generally plays down-wind in the afternoons, so choose your club wisely. Short of the green is OK, but over the green & into the trees, is almost a guaranteed bogey – or worse! You'll also want to avoid the bunker to the right of the green. The green itself is fairly simple, so if you hit it on your 1st shot you should walk away with a 3.
|
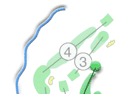
| 12 | Back to business... The 12th hole is nothing but trouble! The entire right side of the hole at the tree line is out-of-bounds. The best bet here is to aim at the stand of trees on the left corner of the dogleg. This should keep you in the center of the fairway. Be sure to aim for the middle of this green, as it has a slope to the right which leads straight to a sand bunker. The green is elevated above the fairway, so be sure to choose your club accordingly.
|
| 13 | From the white tee, the water hazard cutting across the fairway is roughly 185 yards out, so you will need to fly the ball at least 200 yards off the tee to clear it. Oh, and you might want it to be pretty straight too, as the entire right side of this hole at the tree line is out-of-bounds. Try to land your second shot on the front of the green. If you land it past the middle it will most certainly roll off the back.
|
| 14 | Hole 14 is the final par 5, and it is another challenging hole. Starting with a downhill drive to the elbow of a sharp dogleg right, your play continues with a lay-up shot to the crest of a grass ravine about 100 yards from the hole. Having hit two solid shots thus far, your third shot will have you on the green putting for a birdie!
|
| 15 | The 15th hole is a short par 4, dogleg right, with a wooded hillside on the right that is marked as out-of-bounds. I prefer to use a mid-iron from the tee, just to maintain a bit of control. With a well placed tee shot, a short iron is all that will be needed for your approach.
|
| 16 | Sixteen is undoubtedly the toughest, and most intimidating hole on the course. Anything to the right of the cart path is out-of-bounds, and the left side is guarded by natural conservancy area most of the way to the green. A straight shot from tee to green is the only way to play this hole. Once on the green, a smooth putting stroke should get your ball into the hole.
|
| 17 | At last, a shorter hole. But wait, there's a deep ravine from the edge of the tee to the green, and a sand bunker directly in front of the green to gobble up any mis-hits. This is the only hole on the course where it is actually better to be long than short! Choose your club wisely here and you should make a solid par.
|
| 18 | The eighteenth hole is a slightly downhill, dogleg left. With a well placed tee shot, your approach to the green should not be too difficult. Out-of-bounds stakes lurk in the treeline between 18 and 1, so if you hit a shot to the right of them, re-hit! A shot hit over the green may leave you out-of-bounds as well, or at best a difficult chip shot. |
| 19 | My favorite hole! Now that your record-breaking round is complete, stop in at the Bar & Grill in the Clubhouse for a tasty burger and some liquid refreshments!
If you're lucky enough to have shot an 'honor score' (below 80 for men; below 90 for women), hole-in-one, or an eagle, let one of the Golf Shop staff know so we can call it in to the Milwaukee Journal-Sentinel and Waukesha Freeman for you! Just don't blame us if your boss reads about your great score or hole-in-one in the paper, and then realizes you had called in sick to work that day! =)
|
Songbird Hills Golf Club • W259 N8700 Highway 164 • Hartland, WI 53029
Online Reservations • Golf Shop: 262-246-7050 • info@GolfSongbird.com
Copyright © 2000–2017 - Songbird Hills Golf Club, Inc.